by Jesús Zabala - 5 min read
How to Stamp Gold Jewelry
Gold jewelry is not just a statement of elegance. The gold value, tradition, and quality add a special imprint to these jewelry pieces. You can stamp messages, dates, or initials to make jewelry even more personal. Jewelry stamps are also used to mark the serial number of each piece for easy identification. While this sounds great, there is a procedure behind it that one must learn. Keep reading if you are interested in how to stamp gold jewelry.
How to Stamp Gold Jewelry
Stamping gold jewelry or hallmarking, involves engraving identification marks onto pieces to indicate gold purity, origin, and sometimes the maker.
Knowing what stamping gold jewelry is might make you curious about how do you stamp 14K on gold. Stamping "14K" or other karat levels on gold involves marking the jewelry to indicate its gold content. The gold stamping process includes several steps, such as:
- Designing the stamp (it should indicate "14K")
- Preparing the jewelry
- Choosing the stamp
- Positioning the jewelry
- Aligning the stamp
- Applying pressure

Source: shutterstock.com / Photo Contributor: Akatiev studio
1. Prepare the jewelry
Cleaning the jewelry first is very important. Clean jewelry ensures that there are no contaminants when stamping, allowing for a clear impression. To clean the jewelry, you should place it in an ultrasonic cleaner. Add a suitable cleaning solution to remove dirt and residues. Inspect for any remaining particles or tarnish, then rinse the jewelry piece with water and dry it thoroughly, ensuring no moisture remains.
The next step is polishing the jewelry. The purpose of polishing is to smooth the surface, improving the clarity and quality of the stamp. First, you need to do pre-polishing. This is done with a soft bristle brush to remove any surface imperfections. Once you do that, you should apply a polishing compound and use a buffing wheel for a smooth finish. At the end, use a clean, soft cloth to give the jewelry a final shine.
2. Choose the stamp
Selecting the right stamp for gold jewelry is crucial for ensuring correct and clear marks.
To do that, you need to consider some factors, such as:
- Purity mark – Indicates gold content, e.g., 14K, 18K, 22K
- Manufacturer’s or maker’s mark – It represents the manufacturer or artisan
- Assay office mark – Certifies authenticity and purity
- Date mark – This is optional, but useful because it allows tracking production year
- Special symbols – Specific to design or branding
Next, you need to match the stamp to the jewelry size. Use finer, smaller stamps for small pieces to avoid overwhelming the design. You may use larger pieces for clarity.
When it comes to stamp types, there are traditional stamps, made of steel and suitable for manual hammering; custom stamps, designed for unique logos or symbols, ensuring brand consistency; and hydraulic stamps, allowing for even pressure.
Finally, we advise you to make sure the stamp is high-quality, durable, and precise because it should withstand repeated use.
3. Position the jewelry
Stamping gold jewelry requires precision, and securing the piece in place with a specialized jewelry holder or clamp is crucial.
The process involves striking a stamp onto the gold surface to create a hallmark or decorative design, and any movement may lead to distortion. That is why we advise using specialized holders or clamps that provide a stable platform. They will ensure that the jewelry does not shift during stamping.
Stability is vital because it allows you to focus on applying pressure without being afraid that the piece will slip. For instance, a ring mandrel can hold rings securely, while flat clamps work well for bracelets or pendants.
Besides keeping the jewelry in place, holders reduce the risk of deforming or damaging the delicate gold surface.
4. Align the stamp
Aligning the stamp correctly is a crucial step in stamping gold jewelry, as it ensures the mark is clear, centered and placed appropriately. First, we recommend cleaning the gold surface because debris or oils might interfere with stamping. Once you firmly secure the jewelry to the surface, position the stamp over the desired area. You can use a magnifying tool to see better.
Mark the desired spot with a non-permanent marker to help you position the stamp before committing to the imprint. When positioning the stamp, align its design or lettering straight to the jewelry’s contours. Hold the stamp and strike firmly with the hammer, making sure the pressure is even. Proper alignment ensures that the hallmark or design improves the piece’s quality and value.
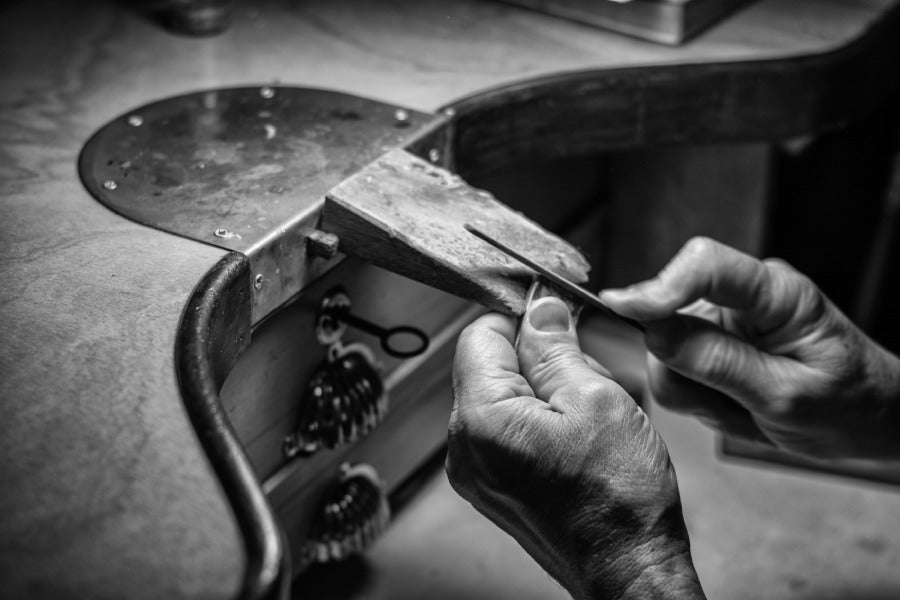
5. Apply pressure
Another critical step in stamping gold jewelry is applying pressure with a stamping hammer or mallet. After positioning and aligning the stamp on the jewelry, the next step is a firm and controlled strike.
First, you should choose a hammer or mallet for jewelry work. Typically, they have flat, hardened steel heads or a brass mallet. The tool’s weight should be sufficient to create a clear imprint without excessive force.
When you hold the stamp, make sure it remains stable and does not shift during the strike, as any move can distort the impression. With your other hand, you should deliver a controlled blow to the top of the stamp.
If a deeper imprint is required, make multiple light strikes instead of one heavy blow to maintain control and avoid damaging the piece.

Source: shutterstock.com / Photo Contributor: Ryan Photo Capture
Conclusion
Understanding the best method and how to stamp gold jewelry properly will result in flawless hallmarking.
In short, the procedure involves several steps. First, clean and polish the jewelry to avoid unclear impressions. Then, choose the stamp that matches the jewelry size. Secure the piece in place with a specialized jewelry holder or clamp.
The next step is aligning the stamp correctly. This is crucial in stamping gold jewelry, ensuring the mark is clear and centered. Finally, choose a hammer or mallet suitable for jewelry work and apply pressure to make the imprint.
We believe that these steps will make the stamping process easy for you, and you will imprint what you have imagined flawlessly.


-
 DESIGNED & HANDMADE IN BALI
-
 FREE RESIZING FOR EVERY PIECE
-
 FREE SHIPPING ON $150+ ORDERS
-
 100% SAFE & SECURE CHECKOUT


